Cheating on Friends and Strangers

Is it wrong to cheat on word games with your friends and strangers?

At ZuluOneZero we love games and puzzles. Any sort of game. Any sort of puzzle. But there is a special reserved bike parking spot for the word games winner of the week.

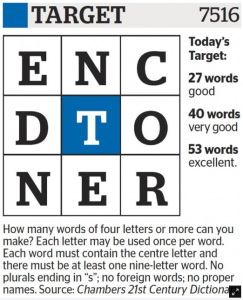
It started with the Target puzzle in The Age.  This is a nine letter word puzzle where they give you nine letters with one in the middle and you need to find as many words as possible.  I wouldn’t mind saying that it gets a bit competitive as we all think with the same brain and don’t like to lose.

This is what a Target puzzle looks like…

But is it OK to cheat?  What is the etiquette and morality of using word helpers?

For example an excellent resource for all word related games and a must for people who want to improve their skills and vocab is http://word-grabber.com/.  I highly recommend it for working on your own.  But please don’t use it to cheat on social games.  That’s just not fair.


Key Quest! Google Play Store Key Signing and the Pain of a Long Slow Death

Should Google Manage Your Keys for Games built with Unity?

We recently had a problem that caused weeks of pain and struggle and it had nothing to do with coding. It was the damn java keystore signing process that we signed up for on the Google Play Store.

The basics are that the Google Play Store requires that all APKs be digitally signed with a certificate before they can be installed.  Apps must use the same certificate in order for users to be able to install new versions or updates.  This is a good and secure system. No issues here.

If you lose your key you cannot distribute any updates to your app/game. This would be really bad for some companies so Google offers to keep your keys safe so that you if you did lose them you can ask to have the key sent to you which gives you authority distribute again. Yay for Google!

But our problems start here in Unity when you build your game for Android the keystore is defined on the Player Settings tab of the Build Setting (CTRL+SHIFT+B).
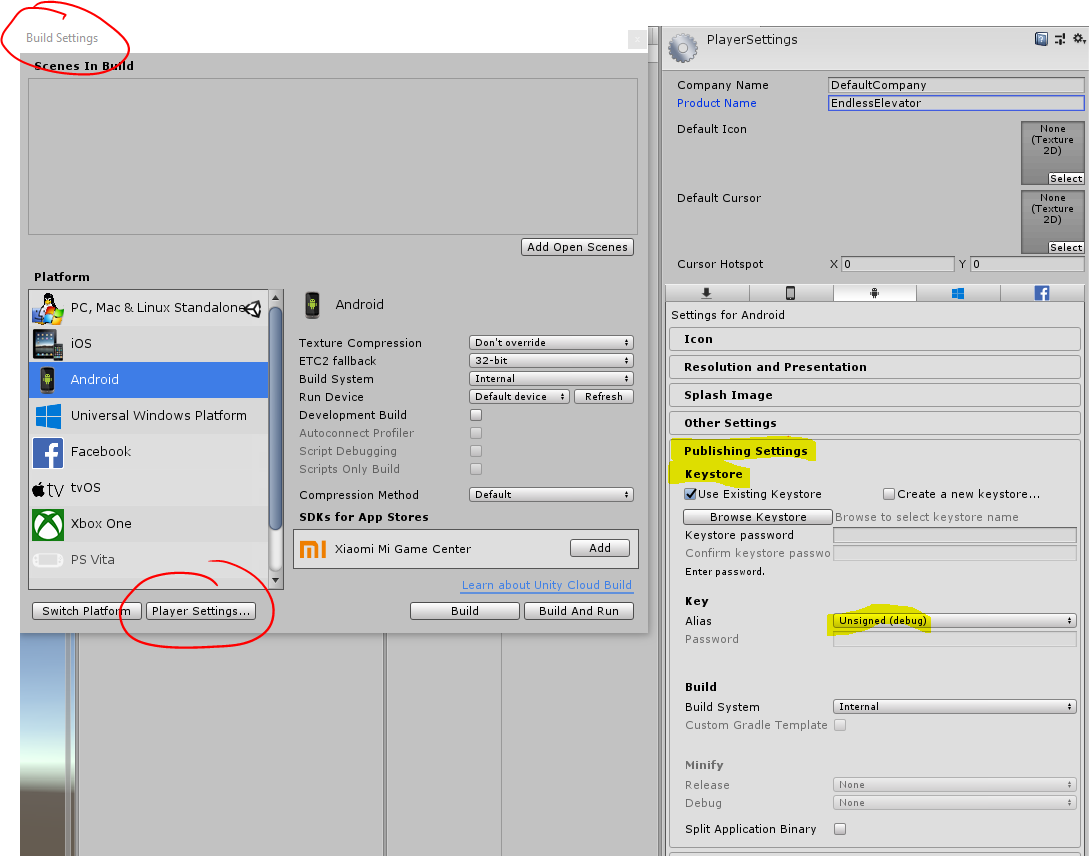
In the first case when running your project from Unity the package (APK) is automatically signed with a debug certificate generated by the Android SDK tools. The debug keystore and certificate are in $HOME/.android/debug.keystore.

This debug certificate is insecure by design and can’t be used on the Google Play Store for publishing an Alpha release but you can upload it for Beta releases.  I think this is where we started going wrong.

When you upload an APK to the Play Store you can opt in to app signing by Google Play. They recommend it but it’s optional. If you prefer, you can continue managing your own keys.

The advantages of opting in to the Google Play Store App Signing program is that 1. You ensure that the app signing key is not lost. 2. If your app signing key is compromised only a user with an account linked to your app can manage an upload key which makes it harder to do something malicious. (If you sign in your apps are signed with an upload key proving your credentials – Google then manages your APK and assigns it the correct and valid signing key).

To quote their documentation: “When using Google Play App Signing, you will use two keys: the app signing key and the upload key. Google manages and protects the app signing key for you, and you keep the upload key and use it to sign your apps for upload to the Google Play Store.

When you use Google Play App Signing, if you lose your upload key, or if it is compromised, you can contact Google to revoke your old upload key and generate a new one. Because your app signing key is secured by Google, you can continue to upload new versions of your app as updates to the original app, even if you change upload keys.

If you lose your keystore or think it may be compromised, app signing by Google Play makes it possible to request a reset to your upload key. If you’re not enrolled in app signing by Google Play and lose your keystore, you’ll need to publish a new app with a new package name.”

Alright. Read that last bit again. It’s important and why app signing might be a really good idea. If you manage your key yourself and you lose it and want to make an update to your app then you have to publish your whole app again under a different name. Again just to drum that home … If you lose your keystore, the only solution is to upload a new instance of the app to the Google Play Store with a new key, a whole new store listing like it’s a different product, as it will not accept an APK signed with a different key.

See: https://support.google.com/googleplay/android-developer/answer/7384423?hl=en
(Manage your app signing keys) The support team only accepts key reset requests from the Play Console account owner. The account owner can fill out a form and attach the upload_certificate.pem file. Then you can update your keystores and API provider registration.

It seems easy and if you want to read funny people on the internet slagging off the Byzantine process check out the comments under this tutorial:
https://www.youtube.com/watch?v=qGoCF0Et_CU&feature=youtu.be

I was a little lost so I started looking for the help of my peers and of course from Unity.

I found a post from one poor soul who was in the same boat as me and the response from Unity Support was: “What do you want to be supported from Unity side? I see this unrelated to our build process.” So someone needs to have a little talk to that chap.

There are more than a few forum posts around this for Unity (and that last one is for andromo but the subject is the same issue).
https://answers.unity.com/questions/1434637/can-google-play-app-signing-be-used-with-unity-and.html
https://forum.unity.com/threads/android-signing.62137/
https://answers.unity.com/questions/1372982/how-i-can-sign-my-apk-with-an-google-plays-upload.html
https://stackoverflow.com/questions/50608172/unity-google-play-app-signing-issue-and-keystore
https://forums.andromo.com/discussion/1980/important-do-not-opt-in-to-google-play-app-signing

Look – and this is really the bottom line – it all got too frustrating and annoying trying to work out what the hell was going on and since I was only in my third release cycle I just opened up a new App on the Play Store and ditched the old one.  But that’s just not possible for anyone who has an App out there and has no other option. So this is the process to getting that pesky key back.

In the Google Play Store you can see your App Signing Keys here:
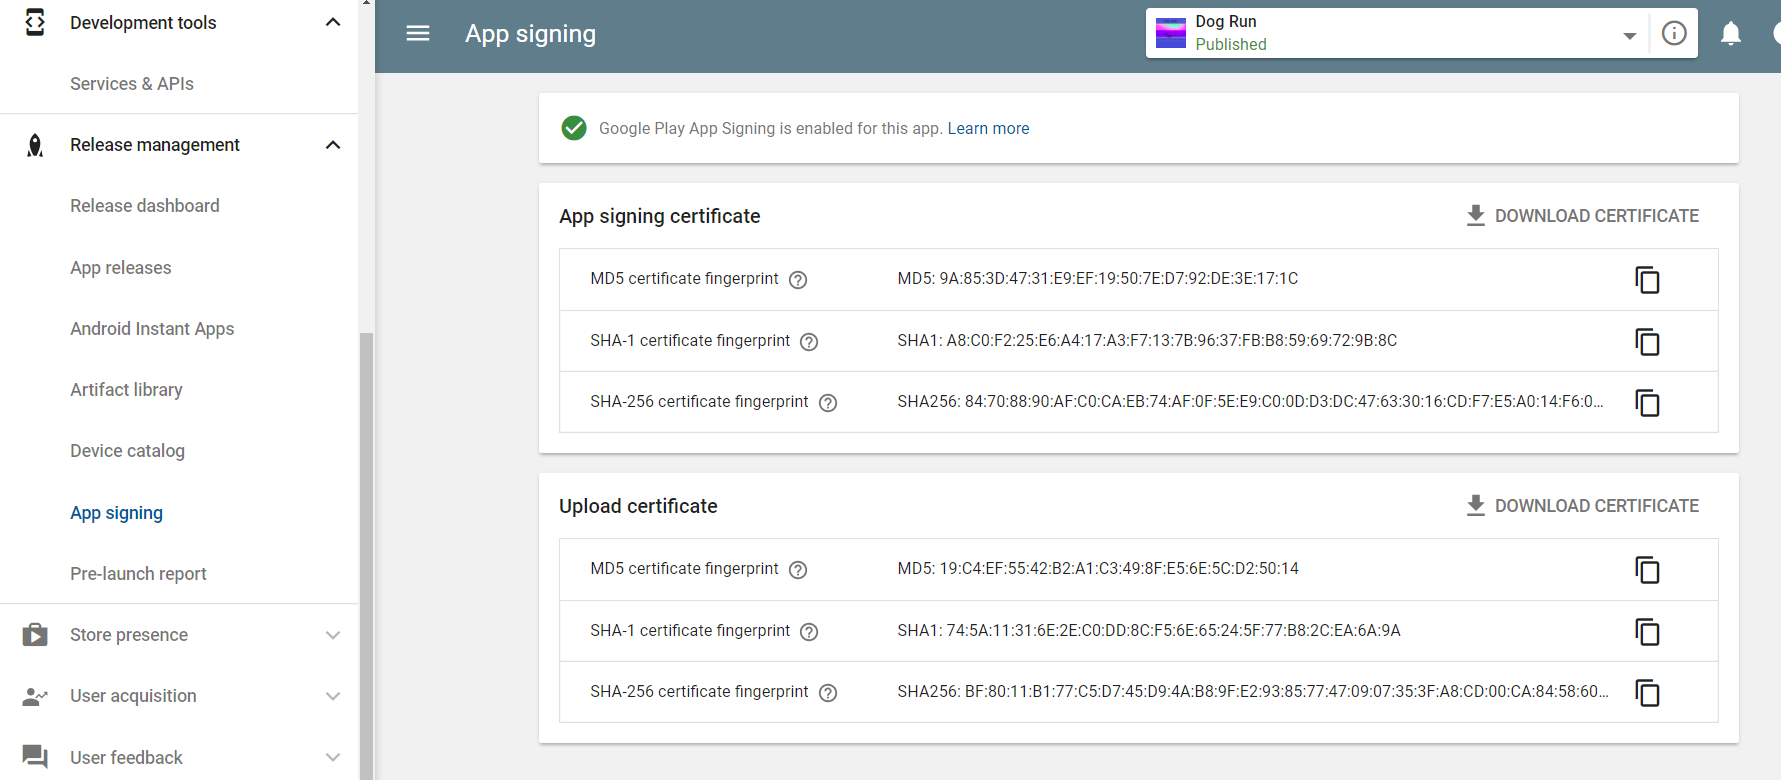
You got your App signing certificate – this is the one that actually signs your app.
SHA-1 certificate fingerprint (above)
SHA1: A8:C0:F2:25:E6:A4:17:A3:F7:13:7B:96:37:FB:B8:59:69:72:9B:8C

And your Upload certificate – this is the one that you use to upload with your APK so that Google knows it’s you.

Your upload key is only registered with Google and is used to authenticate the identity of the app creator.
Your upload key is removed from any uploaded APKs before being sent to users.

SHA-1 certificate fingerprint (above)
SHA1: 74:5A:11:31:6E:2E:C0:DD:8C:F5:6E:65:24:5F:77:B8:2C:EA:6A:9A

In my case the upload certificate was from the default android debug keystore (that I shouldn’t have used):

C:\Program Files\Java\jdk1.8.0_111\bin>keytool.exe -list -keystore C:\Users\<user>\.android\debug.keystore
Enter keystore password:

Keystore type: JKS
Keystore provider: SUN

Your keystore contains 1 entry

androiddebugkey, 10/08/2016, PrivateKeyEntry,
Certificate fingerprint (SHA1): 74:5A:11:31:6E:2E:C0:DD:8C:F5:6E:65:24:5F:77:B8:2C:EA:6A:9A


To generate and register a new upload key, follow the instructions in the Android Studio Help Center.
https://developer.android.com/studio/publish/app-signing#generate-key

You don’t need to use Android Studio you can also do it on the command line (which is easier I think).

First generate a private key using keytool. For example:

# keytool -genkey -v -keystore my-release-key.jks -keyalg RSA -keysize 2048 -validity 10000 -alias my-alias

C:\Program Files\Java\jdk1.8.0_111\bin>keytool -genkey -v -keystore D:\ZuluOneZero\Demo-Unity-Android-key.jks -keyalg RSA -keysize 2048 -validity 10000 -alias Demo4Unity
Enter keystore password:
Re-enter new password:

What is your first and last name?
[Zulu]: ZuluOneZero
What is the name of your organizational unit?
[Unknown]: TheDogRun
What is the name of your organization?
[Unknown]: ZuluOneZero
What is the name of your City or Locality?
[Unknown]: Melbourne
What is the name of your State or Province?
[Unknown]: Victoria
What is the two-letter country code for this unit?
[Unknown]: AU
Is CN=ZuluOneZero, OU=TheDogRun, O=ZuluOneZero, L=Melbourne, ST=Victoria, C=AU correct?
[no]: yes

Generating 2,048 bit RSA key pair and self-signed certificate (SHA256withRSA) with a validity of 10,000 days
for: CN=ZuluOneZero, OU=TheDogRun, O=ZuluOneZero, L=Melbourne, ST=Victoria, C=AU
Enter key password for <Demo4Unity>
(RETURN if same as keystore password):
Re-enter new password:
[Storing D:\ZuluOneZero\Demo-Unity-Android-key.jks]

Note: keytool is located in the bin/ directory in your JDK. To locate your JDK from Android Studio, select File > Project Structure, and then click SDK Location and you will see the JDK location
C:\Program Files\Java\jdk1.8.0_111\bin\keytool.exe
(I used this one but you will have a keytool for every JDK and JRE on your machine – doesn’t matter which one you use)

Then, export the certificate for the new key to PEM format:

# keytool -export -rfc -alias <upload> -file <upload_certificate.pem> -keystore <keystore.jks>

C:\Users\<user>\AppData\Local\GitHub\mingw32\bin\openssl.exe x509 -inform der -in C:\Users\<user>\Downloads\deployment_cert.der -out D:\ZuluOneZero\deployment_cert.pem

Add the certificate to the signing keystore:

keytool -export -rfc -alias Demo4Unity -file C:\Users\roderick\Downloads\upload_cert.der -keystore D:\ZuluOneZero\Demo-Unity-Android-key.jks

C:\Program Files\Java\jdk1.8.0_111\bin>keytool -export -rfc -alias Demo4Unity -file C:\Users\roderick\Downloads\upload_cert.der -keystore D:\ZuluOneZero\Demo-Unity-Android-key.jks
Enter keystore password:
Certificate stored in file <C:\Users\roderick\Downloads\upload_cert.der>

If you want to inspect the certificates (on Windows) right click and open with Crypto Shell Extensions.

Or you can inspect the certificates like this:

C:\Program Files\Java\jdk1.8.0_111\bin>keytool.exe -printcert -file C:\Users\<user>\Downloads\upload_cert.der
Owner: CN=ZuluOneZero, OU=TheDogRun, O=ZuluOneZero, L=Melbourne, ST=Victoria, C=AU
Issuer: CN=ZuluOneZero, OU=TheDogRun, O=ZuluOneZero, L=Melbourne, ST=Victoria, C=AU
Serial number: 3e64dcd1
Valid from: Thu Sep 13 16:28:59 AEST 2018 until: Mon Jan 29 17:28:59 AEDT 2046
Certificate fingerprints:
MD5: F8:D3:CF:84:88:8E:16:EA:3D:74:F0:7E:9E:18:13:C9
SHA1: BD:1B:A2:99:05:11:0E:F6:A0:B5:1A:7B:7D:EB:01:3C:8B:A7:98:6D
SHA256: 7C:24:86:CD:58:1A:2F:74:21:B0:A6:9B:3D:DF:BC:BE:2A:15:F3:23:B9:44:7F:98:5D:8D:FB:24:98:37:82:9C
Signature algorithm name: SHA256withRSA
Version: 3

Extensions:

#1: ObjectId: 2.5.29.14 Criticality=false
SubjectKeyIdentifier [
KeyIdentifier [
0000: 21 44 48 FA 63 97 2D B0 A4 92 2B 38 41 E4 2F 7D !DH.c.-…+8A./.
0010: EA 26 E0 10 .&..
]
]

You can inspect keystores like this:

C:\Program Files\Java\jdk1.8.0_111\bin>keytool.exe -list -keystore D:\ZuluOneZero\Demo-Unity-Android-key.jks
Enter keystore password:

Keystore type: JKS
Keystore provider: SUN

Your keystore contains 1 entry

demo4unity, 13/09/2018, PrivateKeyEntry,
Certificate fingerprint (SHA1): BD:1B:A2:99:05:11:0E:F6:A0:B5:1A:7B:7D:EB:01:3C:8B:A7:98:6D


All the detail above are dummy one’s for demonstration purposes only.
Crushed by Elevator!

We got some feedback from the Endless Elevator Mechanics demo that we did a few days ago that compared it to the old Taito game Elevator Action (See some classic 1983 Game Play footage here: https://www.youtube.com/watch?v=durTn-5IAms).

I did love that game. Especially the music which I still find running around in my brain box decades later. So in homage to my favourite part of that game – crushing the bad guys with the elevator – I added it into the game play of Endless Elevator today.

OK self indulgent … I know.  Enjoy!

Don’t forget we are still Beta Testing The Dog Run game.

If you want to help with you can sign up here: https://play.google.com/apps/testing/com.ZuluOneZero.TheDogRun

Endless Elevator Mechanics

Howdy. Xander here…

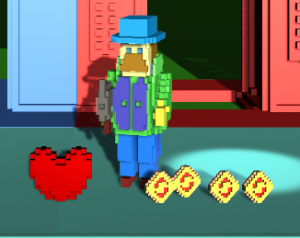
This is a quick demo of the basic play mechanics from our new game in development Endless Elevator.  We got the basic movement working a while ago (see our Smooth Moves post) and now that The Dog Run is in BetaTesting we can spend some more time working on this game.

(If you want to help with Beta Testing and be an early adopter of The Dog Run you can sign up here: https://play.google.com/apps/testing/com.ZuluOneZero.TheDogRun)

This clip below for Endless Elevator shows:

The Good Guy Cop Character movement (oh yeah he goes left and right)

Firing his awesomely powerful dumb dumb gun

Using (the eponymous) Elevator (see if you can spot the camera tracking bug!)

Traversing (the namesake) Escalators

Finally entering a doorway with a Power Cube (I’m not sure what it will look like in the final game yet). When he goes into a doorway with the special block the game flips and he goes into a Super Spy Store (not shown) where new fun weapons and power-ups are available!  Cool.

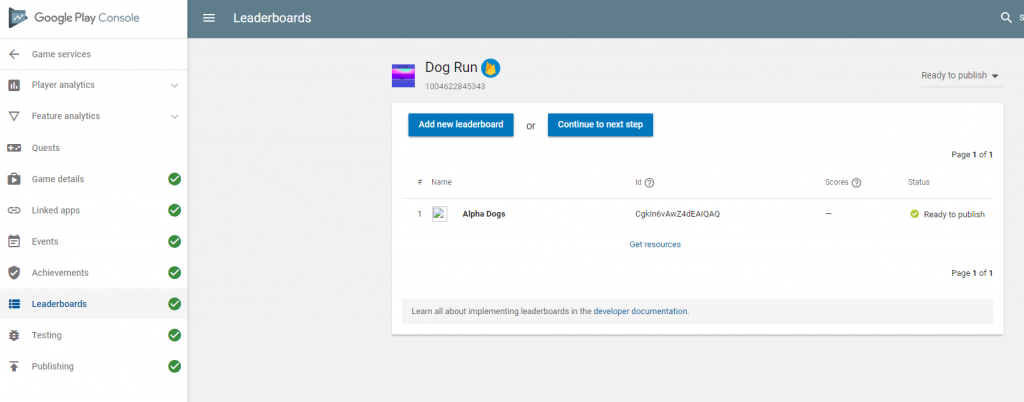
Google Play Store Leaderboard Integration

This month we integrated our newest game The Dog Run with the Google Play Store Leaderboard service.  It looks, and possibly even should have been, really easy but in this reality it wasn’t.  One big problem that  was really time consuming was that we used the Google key signing service and then had an issue with our key.  Bit I think I’ll describe that in a separate post as it probably deserves more info that we got space for here and wasn’t really what this post is all about.

This post is a about how we integrated our game with the Google Play Store Leaderboard!

(The game has gone into Beta Testing if you would like a preview click the link here!)

First of all – do the research! Read the documentation and look at some tutorials. I found the documentation for the Plugin to be useful and this tutorial to be of the most help (thanks AppGuruz):

http://www.theappguruz.com/blog/leaderboard-setup-for-android-in-unity

But this is how we did it…

1.  To start with you have to be logged in to your Unity account when you open up your project in the Unity Editor.  You will need it to authorise stuff.

2.  Next you will need to import a copy of the Google Play Games plugin for Unity. This is an open-source project which integrates the Google Play Games API with Unity. (Disclaimer: it’s not endorsed or supervised by Unity Technologies).

This is the latest version I used and if you click on the image it will take you there.

The README.md in the repository has a pretty good summary of how to set it up and configure it and examples of how to call features and functions.

The plugin supports a heap of things:

Achievements
Leaderboards
Turn-based Multiplayer
Real-time Multiplayer
Events and Quests
Saved Games and
Nearby Connections

All we wanted was the Leaderboard so let’s start there.

3.  Import the package in the Unity Editor

Assets > Import Package > Custom Package

4.  Then open the Google Play Games Window in the Editor that will appear after you import the package.

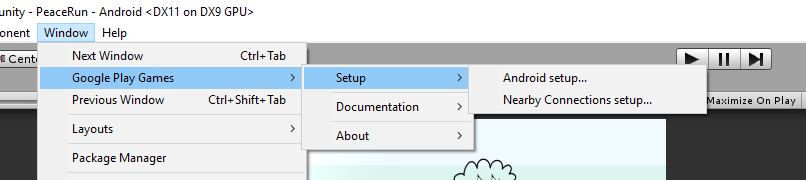
Window > Google Play Games > Setup (Android Setup on my machine)

In the Android Setup you will put your Resource Definitions (we only had one for the leaderboard).

I’ll get to how we set up the Resources in the Google Play Console further down but this is what it looks like completed:

(The info in this screenshot is a dummy record so I didn’t have to redact anything for security)

5. Click On “Open Play Games Console” – it’s the blue highlighted link in the Android Configuration page above.

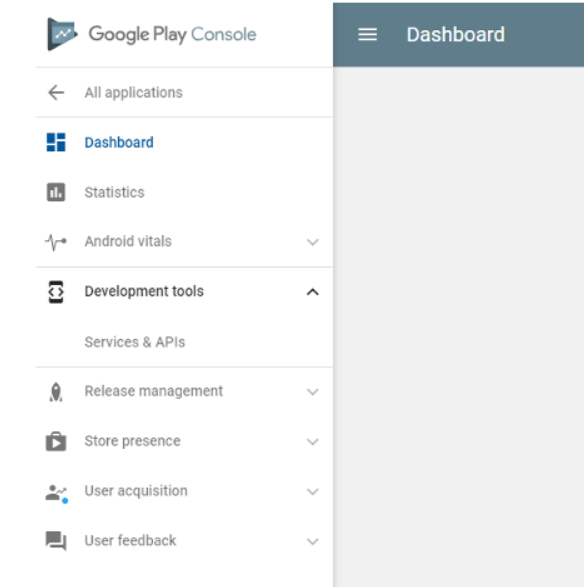
6. Go to the Development tools section and find the Google Play game services section.

7.  Click on the Game services section link

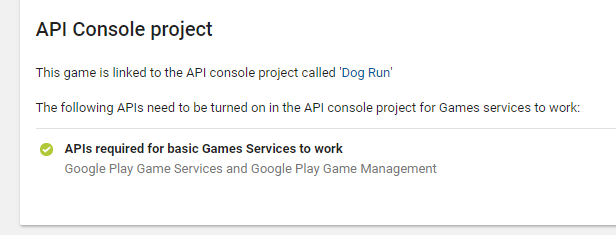
Right down the bottom will be this section confirming your API service:

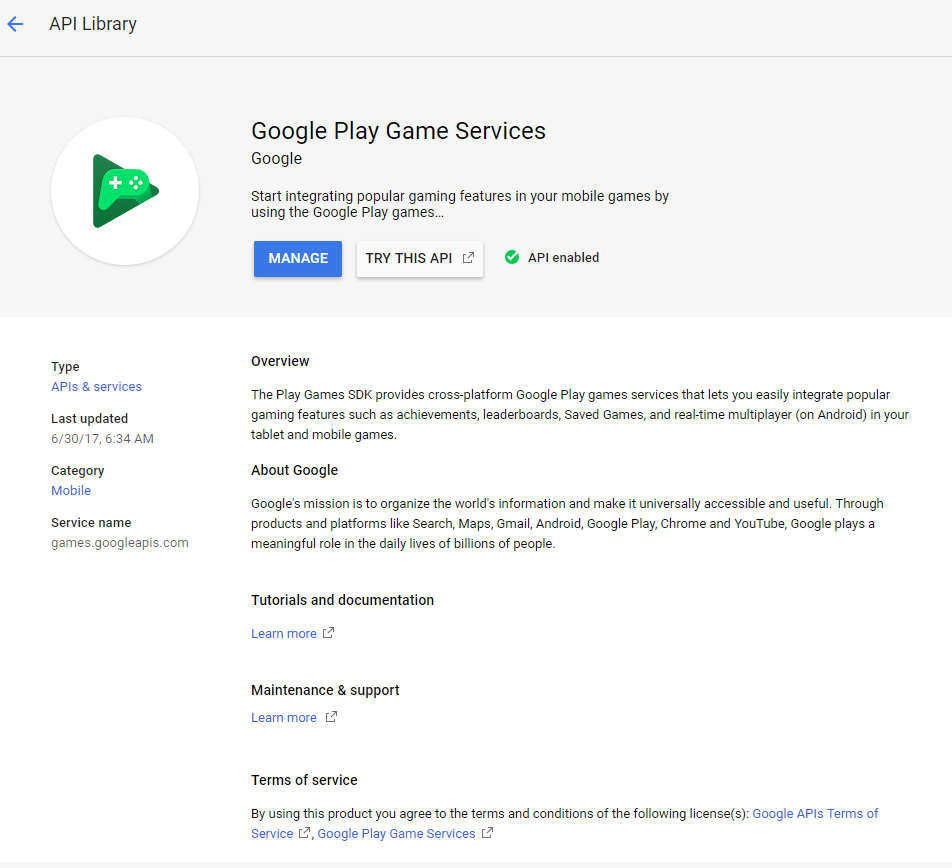
8.  Find the Service in the list of Services and click on Manage this API (if you need to set up more services):

9.  Right there after drilling down through all those pages you will find your resources:

See that blue link there that says “Get Resources” – that’s your baby.  Once you click on that there are four tabs with a variety of formats.  You want the one that’s there by default for Android.  Take a copy of that xml and paste it into your Androind Setup/Configuration page in your project and your halfway there.    🙂

Now for the fun bit of configuring and scripting it for the game.

There is a bit of trial and error and unless you can connect up an Android device and actively debug through the console using that device there is a long iteration cycle for testing.  From within the editor you cannot test any of the functionality such as logging in as the Google Play Games user and opening the Leaderboard. You have to have the APK loaded up to the Google Play Store and in an Alpha Release Track to start testing.  The package has to be signed using a full key (ie. not the default debug one) and you need to install the package on to your test Android device from the Play Store so that it has the correct keys to work. You cannot build it locally and run it straight from your workstation.  The other thing is that in the Alpha Track the Leaderboard functionality can sometimes be really slow and sometimes just doesn’t load so because of that you need to be patient when testing.

To get this working in my game I created an empty game object and attached this script to it:


using UnityEngine;
using GooglePlayGames;

public class GPG : MonoBehaviour
{
    #region PUBLIC_VAR
    public string leaderboard;  // This is where to pass the resource string in!
    #endregion
    #region DEFAULT_UNITY_CALLBACKS
    public long my_score;  // This is where I passed in the users score
    public bool success;
    public bool GPGLoginReturned;

void Start()
    {
        PlayGamesPlatform.Activate();
        LogIn();
    }
    #endregion
    #region BUTTON_CALLBACKS

// Login to Google Account
public bool LogIn()
    {
        Social.localUser.Authenticate((success) =>
        {
            if (success)
            {
                string userInfo = "Username: " + Social.localUser.userName +
                    "\nUser ID: " + Social.localUser.id +
                    "\nIsUnderage: " + Social.localUser.underage;
            }
            else
            {
                Debug.Log("Login failed");
            }
        });
        return GPGLoginReturned = true;
    }


// Show All Leaderboards
public void OnShowLeaderBoard()
    {
        Social.ShowLeaderboardUI();
    }
	
// Adds a Score to the Leaderboard	
public void AddScoreToLeaderBoard(long my_score)
    {
        if (Social.localUser.authenticated)
        {
            Social.ReportScore(my_score, leaderboard, (bool success) =>
            {
                if (success)
                {
                    Debug.Log("Update Score Success");
                }
                else
                {
                    Debug.Log("Update Score Fail");
                }
            });
        }
    }

// Logout the Google+ Account
public void OnLogOut()
    {
        ((PlayGamesPlatform)Social.Active).SignOut();
    }
    #endregion
}

That basically handles all the interaction with the Google Play Services like user logon and off, showing the leaderboard, and updating the leaderboard. It’s about as simple as you can get.

To update an actual score during gameplay I added this code to the relevant section of the game:


if (!score_uploaded)
{
//AddScoreToLeaderBoard()
var gpg_Script = GPGObject.GetComponent();
long longScore = System.Convert.ToInt64(score_timenow);
gpg_Script.AddScoreToLeaderBoard(longScore);
score_uploaded = true;
}

And to show the Leaderboard I attached and exposed this method to a button call.


OnShowLeaderBoard()

That’s pretty much it. But factor in more time that you think.
It took me ten package builds and releases to get it right – hopefully you won’t have that much trouble.

ZuluOneZero takes “The Dog Run” for a walk on the Google Play Store


An Endless Runner for Android goes into Beta Testing.

Take your dog for a run – it’s good for your heart – and supports animal rescue!

This is a free game – with no pop ups. In the Alpha release there is the option to watch ads.
All profits from the ads go to support animal welfare and animal hospitals.

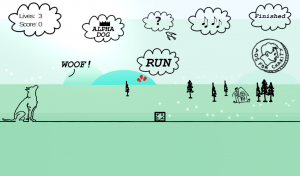
The game is about taking your fun lovin’ pooch out running – but watch out! There is a bunch of obstacles in your path – it’s a good thing you are a natural jumper and can run all day in all sorts of weather.

Preview the game here (You will need the Opt in URL):
https://play.google.com/apps/testing/com.ZuluOneZero.TheDogRun

Feedback can be posted on the website in the comments or directly by email.

ZuluOneZero Game Design

Games


zuluonezero.z10@gmail.com

The Dog Run Soundtrack

Hi Gene here !  We are getting really close to pushing our Dog Run game into Beta Testing on the Play Store.  The original soundtrack was a little too moody for the game so we started working on a new one.

If you want to be a Beta Tester Subscribe to this mail list on the right.

We started with a basic rhythm and then built it up into eight different loops. Next the crazy funky keyboard riff was added in a really simple twelve bar step pattern.  It took a while to get it right but the wailing howling synth was laid over the top in about sixteen takes. Worth it though. Last we added a few undulating effects for interest and mixed it down inside the box.  I’ve been listening to it loop about in my head for a few hours at a time and I think it’s making me loopy. Damn fine effort even if I say so myself.

Check it out on Soundcloud: (Set it too loop!)

Gene out.

In Game Currency

Brian Here…

Every time I write that I misspell it as brain here and that’s probably appropriate as this post is all about using your brain to make money from your game. That’s at least part of the whole point right?

You can read the experts blogging about this all over the internet and it boils down to a few basic facts – and when I says facts it’s only true because everyone says it and repeats it:

  1. The free to play games with multiple virtual and real “currencies” in the game economy do best.
  2. Rewarded ads monetise players who do not spend. Apparently that’s most of them.
  3. You need to get players hooked on the game first and then introduce rewards slowly.
  4. You need to build networks with partners who can help promote and support your game and economy.

It’s all about volume and scale. You’re not making a huge amount of cash from every player. It’s small change dollars and cents. So to make any money you have to have heaps and heaps of people who not only download your game but play it regularly. So the game better be good and popular.

The rewards are going to start slowly. So there is no big bang money injection when you release your game. It’s a real slow burn and you need to pick your engagement points so that the game stays enjoyable through all that time.

But how the hell do you do that? You have to test the game with heaps and heaps of people and different target audiences. This is not functional testing. I mean actual player response. You need to know when those frustration points are that mean a player may watch an ad or buy some power-ups to get through some level or reach some achievement. To do that you also need an in-app monitoring system that tracks players progress and provides up to date statistics on what’s happening out there in user land.

You need to be able to squeeze those moments and know which one’s are working and be able to replicate them in other situations in the game. You need to entice players not only with a great game but with achievements and rewards, and special power-ups, and gems and hearts and badges and leader boards and competitions and in game sales campaigns. It’s a huge task.

So these are the metrics and these are the logistics. It’s like organising an empire or a battlefield (hey that would make a good game!). It needs lots of planning and help from as many sides as you can muster.

Every time the player gets rewarded it only seems fair that we get rewarded as well for a job well done.

Fly Birdy! Fly! – 2D Curved Movement in Unity


Xander here…

I’m really pushing to get the flip book style 2D endless runner game we started at the beginning of the year finished.  The game is called Dog Run and as the title suggests is about taking your fun lovin’ pooch for a run – but watch out! There is a bunch of obstacles in your path – it’s a good thing you are such a natural jumper and can run all day.

If you want to do some beta testing of the game subscribe to this blog using the form on the right!

So I wanted to do a nice simple bird flying in the background to add a bit on interest (and also as a distraction for the player).  How hard do you think that would be?  It’s just a little birdy flapping about.  Whole games have been made with less!  It actually too me three days to get this little bird looking right.

In the beginning I started with just a straight fly-by  – a simple transform move that crossed the screen.

Straight


transform.position -= new Vector3(0.1f, 0, 0);

Not that exiting right? But you know – it’s a start.


I thought a little more about it and decided it would look better if there was a bit more movement.  I originally envisioned a sort of swooping dive from the top of the screen.

This got me a little closer but it looks really nothing at all like a bird would or could fly. A mechanical bird maybe – but not your darling little currawong.

ZigZag


if (updown)
{
target.position = new Vector3(transform.position.x - 2, transform.position.y - 2, transform.position.z);
updown = false;
}
else
{
target.position = new Vector3(transform.position.x - 2, transform.position.y + 2, transform.position.z);
var desiredRot = new Vector3(0, 0, -30);
updown = true;
}

Not such an elegant piece of code but it did what I wanted it to without a huge fuss.


ZigZag with Rotation

I tried to fix it a bit by adding in some rotation towards the direction being flown:


from.rotation = transform.rotation;
to.rotation = Quaternion.Euler(new Vector3(0, 0, 30));
transform.rotation = Quaternion.Lerp(from.rotation, to.rotation, Time.time * lspeed);

I really wasn’t liking where this was going.

Follow the Sine

I had the brainwave to start using a centre point and looping the bird around it with transform.RotateAround();  Which started off looking really good. But all I could do was get the bird to fly in circles – which started to look a little mad!

Finally after many attempts I found a method for using a Sine function that looked like it would work really well.  It meant adding a rigidbody to my object and a bit more overhead than I really wanted for a background character but what the heck I’d spent this much time on it – might as well have it look the way I wanted.


public Rigidbody2D rb;

public Transform target;    // A point on the far side of the screen to fly towards
public float speed;             //  I ended up between 2 and 3 in the inspector for this one
public float amplitude;     //  How high (or low) each wave would be - around 8 worked best
public float frequency;     // How many waves would run in the given time (2 to 4 was used)

private float startTime;
private Vector3 direction;
private Vector3 orthogonal;

void Start()
{
startTime = Time.time;
direction = (target.position - transform.position).normalized;    // Which way to head
orthogonal = new Vector3(-direction.z, direction.x, 0);               //  Which wave to catch!
}

void FixedUpdate()
{
float t = Time.time - startTime;
rb.velocity = direction * speed + orthogonal * amplitude * Mathf.Sin(frequency * t);
// The Black Magic
}

This worked a treat and with a bit of tuning was dipping and diving all over the shop!


All I needed to do next was to get a little rotation into the picture and we were totally flying!

Sine with Rotation


transform.right = -rb.velocity;


Thanks to: http://blog.shamanland.com/2016/03/move-by-sinusoid.html

For helping me understand what I wanted and for not protecting me from the details.